
Route planning in Ruckly: a complete tour
A guided tour of Ruckly's route planner, Start Near, Smart Routes and Freeform, 3D terrain, waypoints, elevation profiles, GPX, offline maps, route mastery, and off-route alerts.
6 min read · Updated July 11, 2026
Ruckly's planner is built for the way ruckers, hikers, and runners actually use the outdoors, from a quick neighborhood loop to a full day in the mountains. Here's a tour of everything it can do, from dropping the first point to following the finished route in the field.
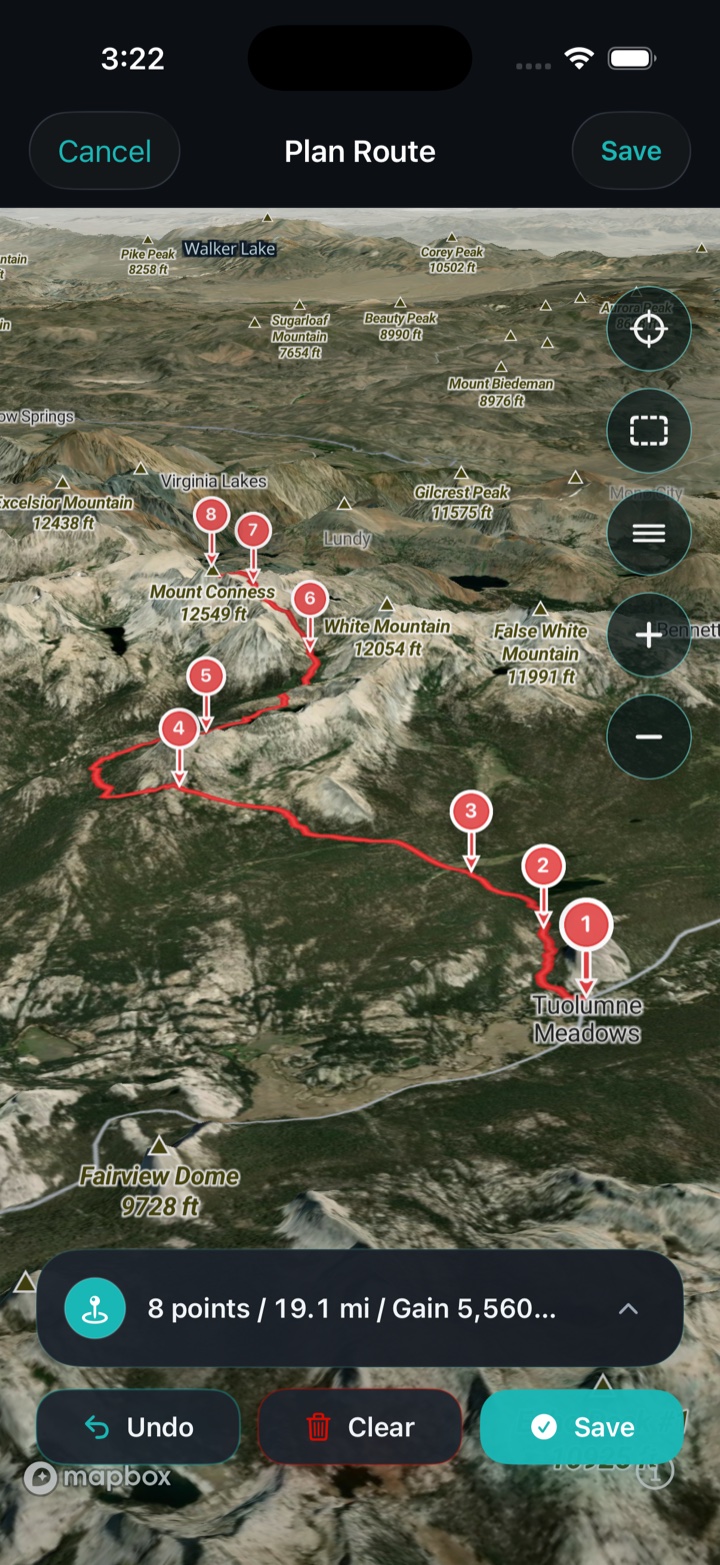
Start where you're going with Start Near
Before you open the planner, use Start Near to jump straight to the right place. Search a trailhead, park, town, landmark, or address, then choose Open Planner Here and Ruckly drops you on the map there, no panning across the country first.
Nearby results appear first, so for a far-away trip, use a full address or specific place name. Prefer to explore? You can always open the planner directly and pan the map yourself.
Draw the line: Smart Routes or Freeform
Every route is just a series of points you tap onto the map. How Ruckly connects them is up to you:
- Smart Routes snap your line to mapped paths, trails, and roads between points, ideal when you want to follow real, established ground.
- Freeform lets you draw the line by hand, perfect for off-trail segments, or when the mapped data is missing, wrong, or simply not the path you want.
Choose One Way for a point-to-point route or Out & Back to mirror your line and return the way you came. Add points to shape the route, then tap Done, and Undo, Clear, or Save at any time.
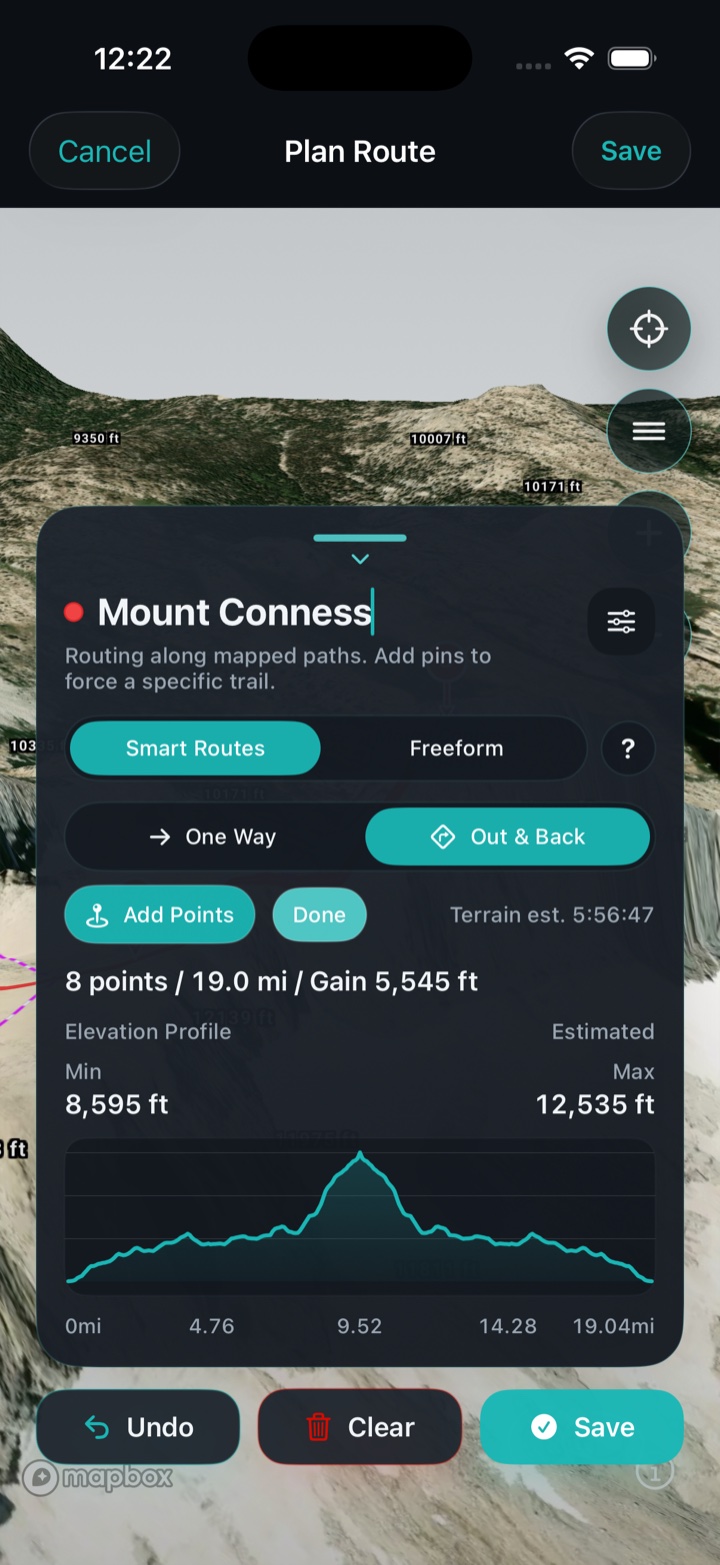
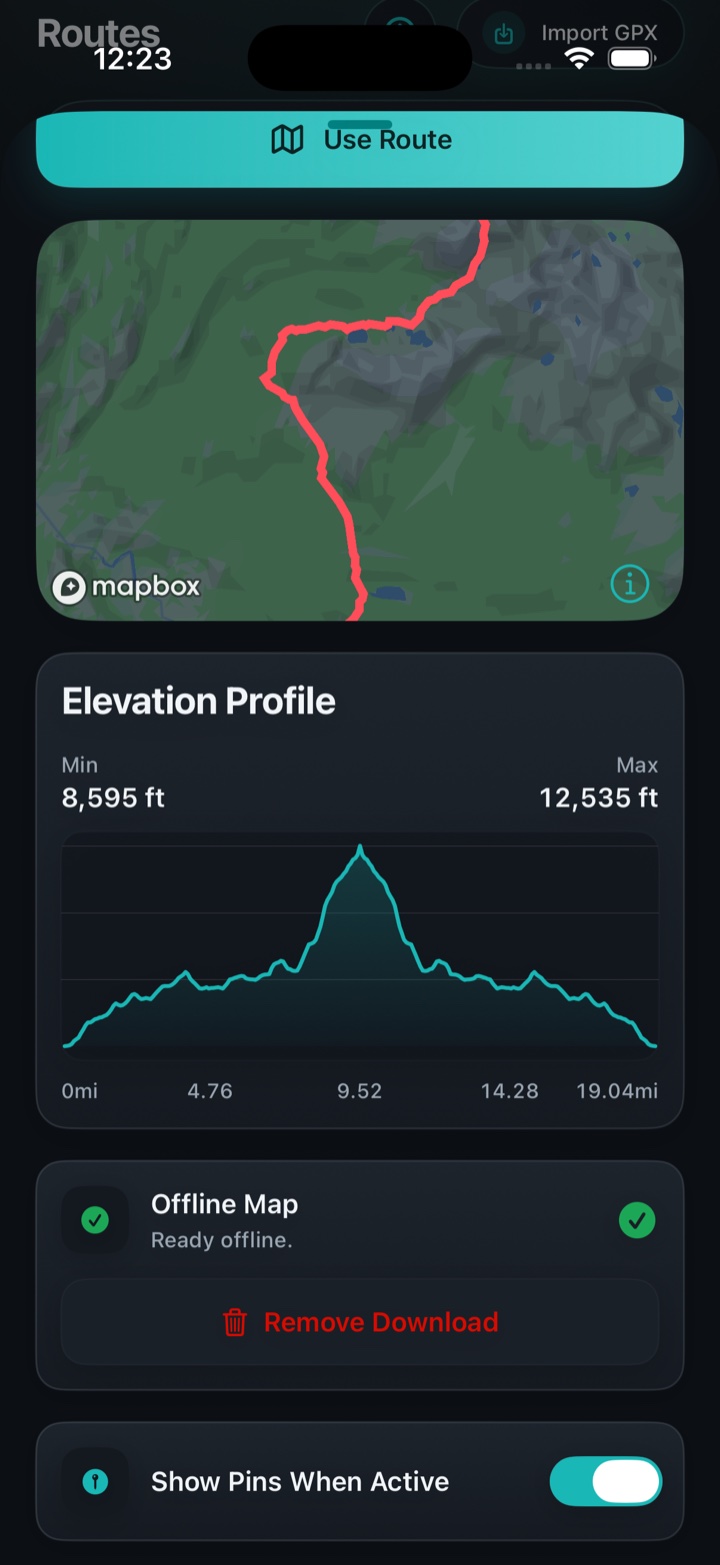
As you build, Ruckly keeps a running count of points, distance, and elevation gain, and draws a full elevation profile so you can see where the climbs fall before you commit. (Gain is a planning estimate, Smart Routes use route elevation data when available, or a digital elevation model when it isn't.)
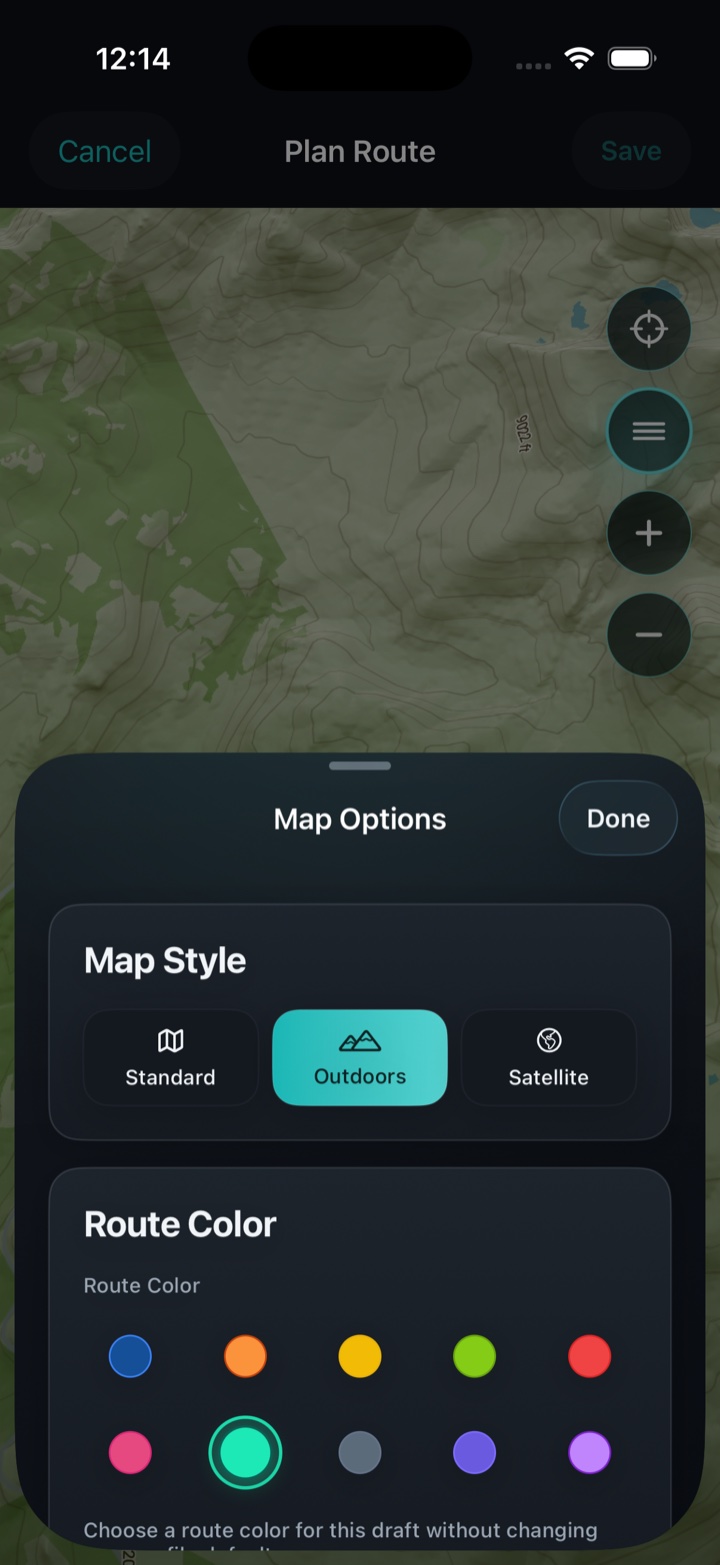
Choose your map: Standard, Outdoors, or Satellite
Match the map to the job:
- Standard is best for everyday clarity and uses the least battery.
- Outdoors highlights terrain, trails, and contours.
- Satellite shows the real-world surface, parking, trailheads, fields, and tree cover.
Read the land in 3D terrain
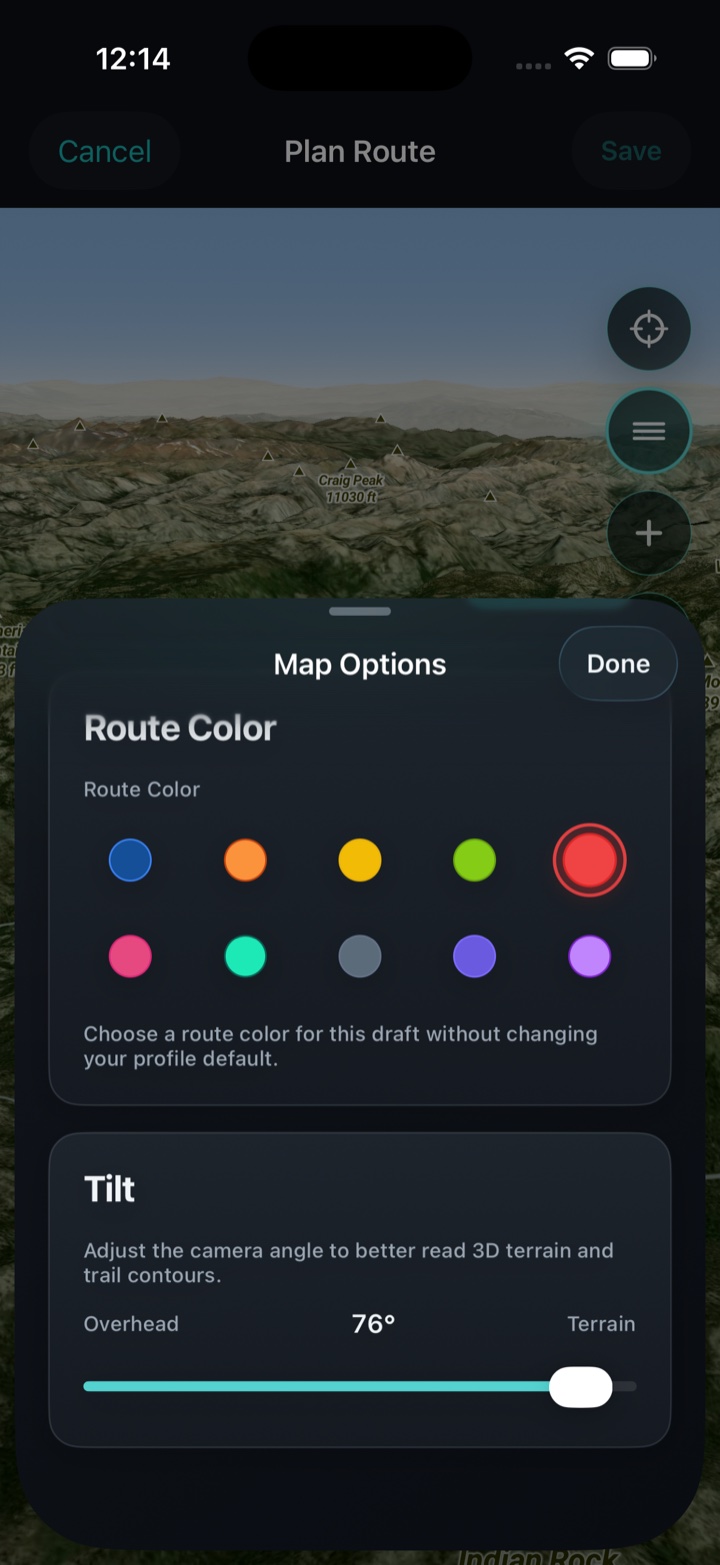
Outdoors and Satellite both render in 3D terrain. Tilt the camera from overhead toward the horizon, or drag two fingers up and down on the map, to read hills, ridges, valleys, and access points the way you'll actually meet them on foot. It's the fastest way to understand a climb before you ever load the pack.
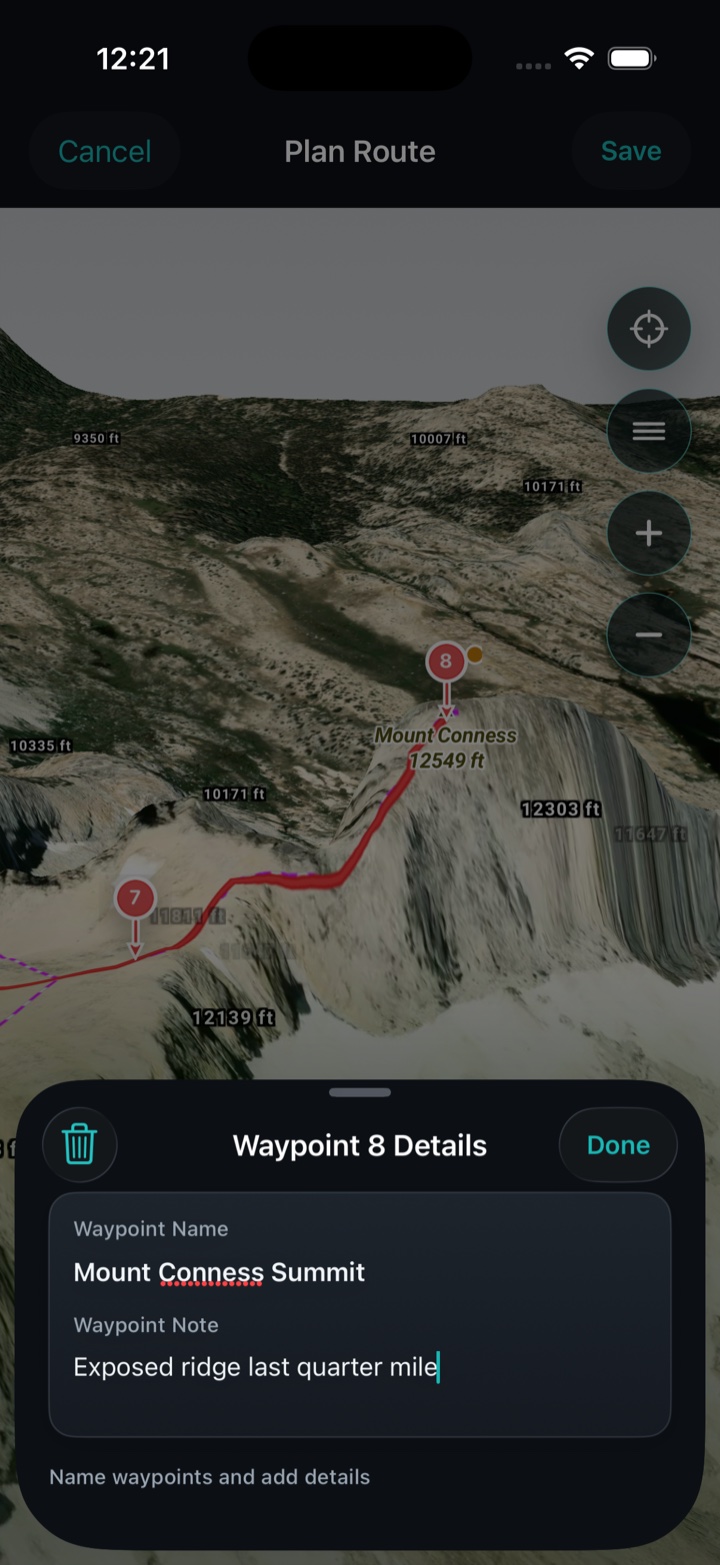
Mark the spots that matter
Tap any point you've placed to turn it into a named waypoint with a note, a water stop, a tricky turn, a river crossing, a bail-out point, or a scenic overlook. Those notes travel with the route, so a good plan stays useful the next time you run it.
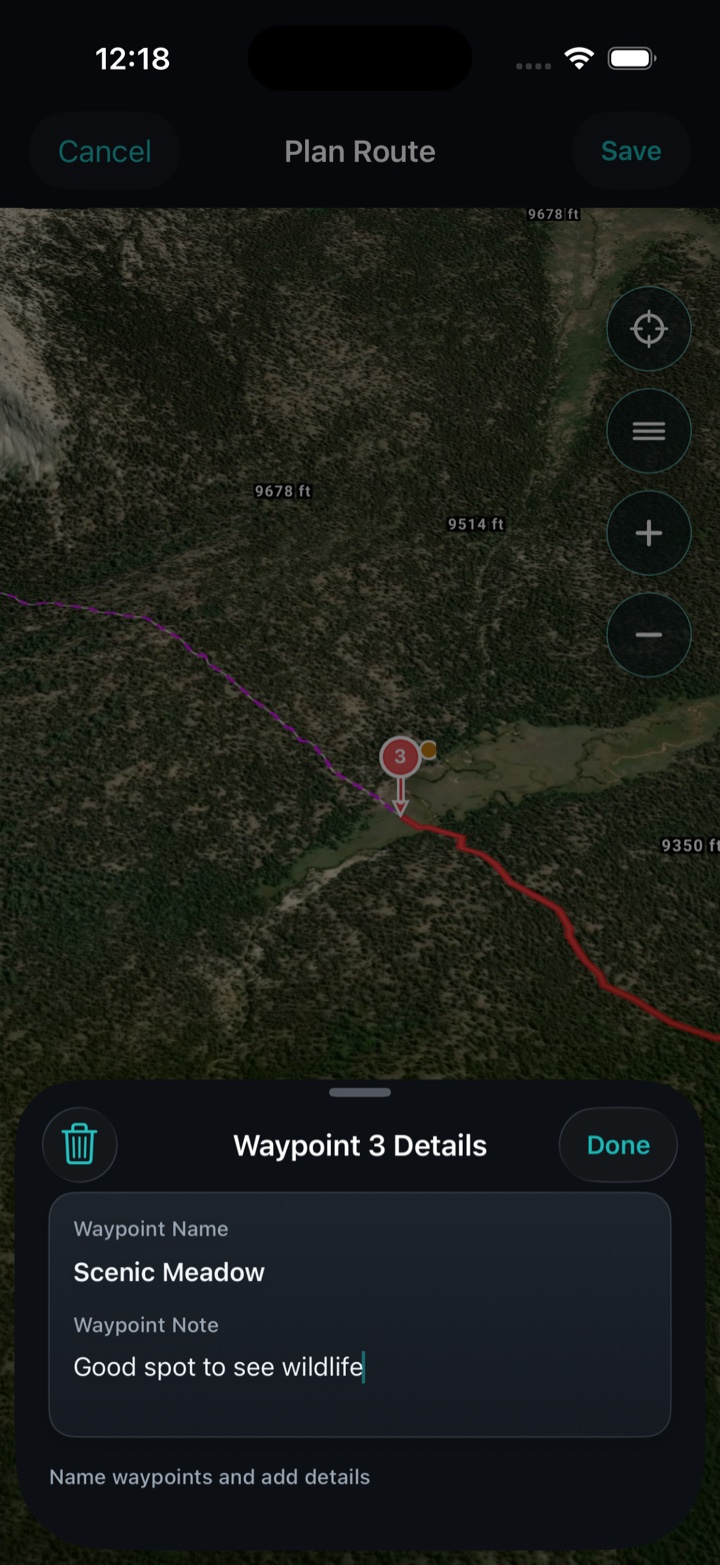
You can also give each route a color so it's easy to recognize on the map and easy to tell apart from your live session track.
Bring routes in and out with GPX
Already have a route from somewhere else? GPX import pulls in files you've downloaded, exported from another app, or been sent, a quick way to add trails, hikes, runs, and rucks to your library. GPX export lets you share a route or back it up. Many hiking, running, and backpacking sites offer free GPX downloads.
Take the map offline
Heading somewhere with spotty signal? Download an offline map for a saved route and it keeps working past cell service. Ruckly stores the route, its elevation profile, and the map tiles so the whole thing is available when you're out of range.
Save it, then master it
Save a route and it becomes a reusable benchmark. After a few verified completions, Route Mastery starts tracking records for that route, full completions, your fastest completion, best route score, and heaviest pack carried on it. Repeating the same ground is what turns scattered workouts into visible progress.
Follow it with off-route alerts
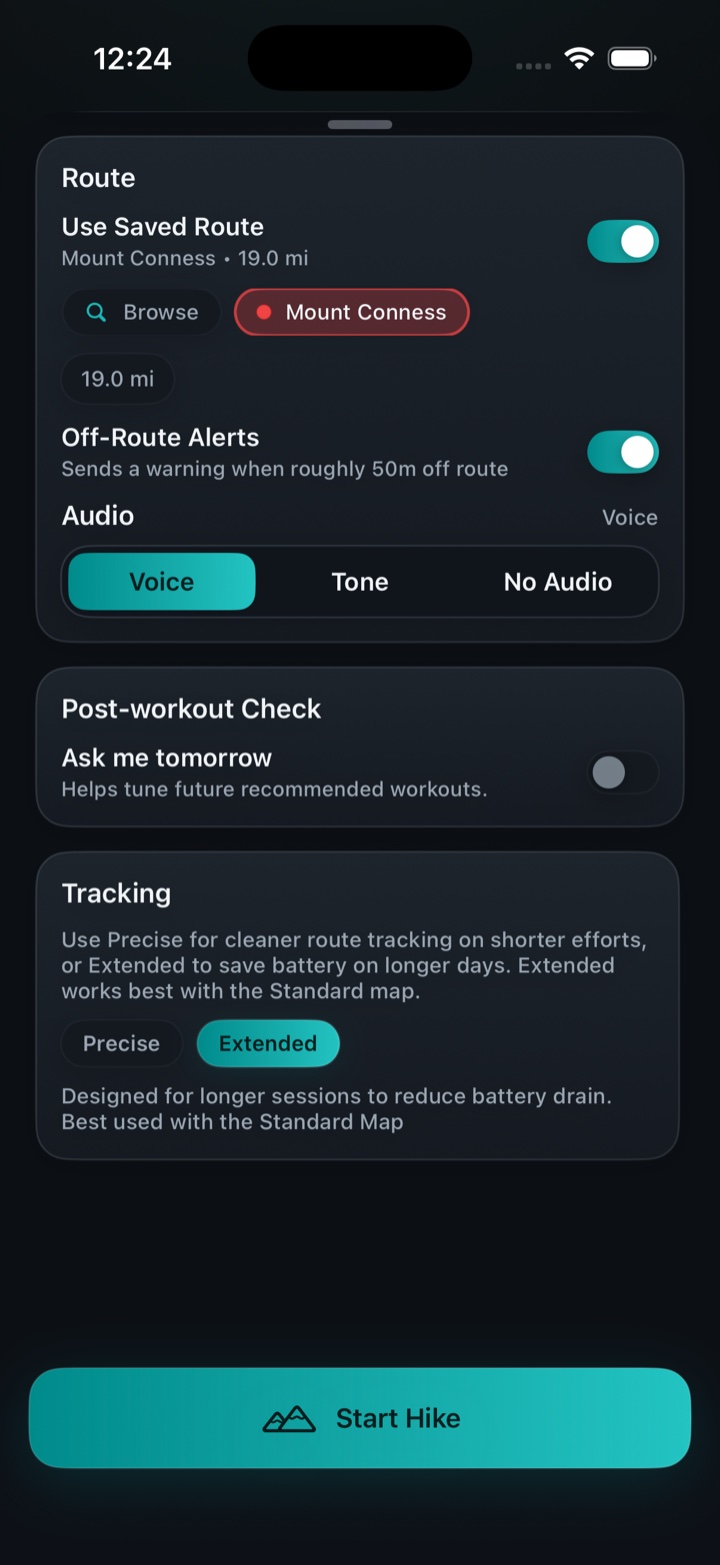
When it's time to go, load the saved route on the Start screen and turn on off-route alerts. Ruckly nudges you, by voice or tone, if you drift roughly 50 meters (about 165 feet) off the line, so you can stay on plan without staring at the screen.
What's in Ruckly Pro
Smart Routes, saving and editing routes, waypoint notes, GPX import/export, offline maps, route alerts, and Route Mastery are part of Ruckly Pro. See pricing for the full breakdown.
A few tips for a route worth repeating
The tools are only half of it. A good plan is usually a simple one:
- Make it repeatable. A familiar loop you can compare against beats a new route every time.
- Respect terrain over mileage. A flat two miles and a hilly two miles are different workouts under load.
- Build in easy exits. Routes that pass near home, a car, or water are easier to cut short.
- Match the route to the pack. Heavier load, simpler route, change one variable at a time.
- Mind the weather and light. Heat, rain, and darkness all change a ruck; plan shade, water, and visibility before you need them.
If you're planning routes to prepare for a trip, rucking to train for a hike covers how to match local elevation to what you'll actually face.
Plan the route, then track the ruck
Use Ruckly to build repeatable routes and keep the distance, elevation, load, and effort from every session in one place.
Keep reading
5 min read · July 10, 2026
Beginner Rucking Tips: How to Start Safely and Build a Habit
Practical beginner rucking tips for choosing a pack, starting with a manageable load, planning your first route, and progressing without overdoing it.
Read guide4 min read · July 10, 2026
A 4-Week Beginner Rucking Plan to Build a Consistent Habit
A simple four-week beginner rucking plan focused on short, repeatable walks with a loaded pack, not rushing weight, distance, or pace.
Read guide